Creating the perfect gipfeli recipe is more than just following steps—it’s about understanding the history, mastering techniques, and enjoying the process of crafting a flaky, golden delight. This guide covers everything you need to know, from the origins of gipfeli to step-by-step instructions and helpful tips to avoid common mistakes. By the end, you’ll feel confident enough to bake your own gipfeli and even experiment with creative fillings or toppings. Let’s get started.
Table of Contents
What Is a Gipfeli Recipe?
Origins of the Traditional Gipfeli Recipe
The gipfeli is often referred to as the Swiss croissant, but it has its own unique characteristics. Historically, this beloved pastry traces its roots back to Austria, with influences from France’s croissant culture. Swiss bakers adopted and adapted the idea, creating a less buttery, slightly sweeter alternative to its French counterpart. Today, gipfeli is a staple in Swiss bakeries and breakfast tables, loved for its versatility and flaky texture.
Differences from Croissants
Though gipfeli resembles a croissant, the two differ in a few key ways. Croissants are known for their rich, buttery flavor, while gipfeli has a subtler sweetness and a slightly firmer crust. The lamination process for gipfeli dough is also less intricate, making it a bit easier for home bakers to handle. This makes the gipfeli recipe a great starting point for anyone eager to try their hand at laminated pastries.
Why the Gipfeli Recipe Is Loved Worldwide
Whether served plain, filled with chocolate, or topped with almonds, gipfeli suits every palate. Its delicate layers make it ideal for breakfast, snacks, or even light meals when paired with savory fillings. For many, gipfeli is more than just a pastry—it’s a symbol of warmth, comfort, and the joy of homemade baking.
Key Ingredients for a Flawless Gipfeli Recipe
Essential Ingredients for a Perfect Gipfeli Recipe

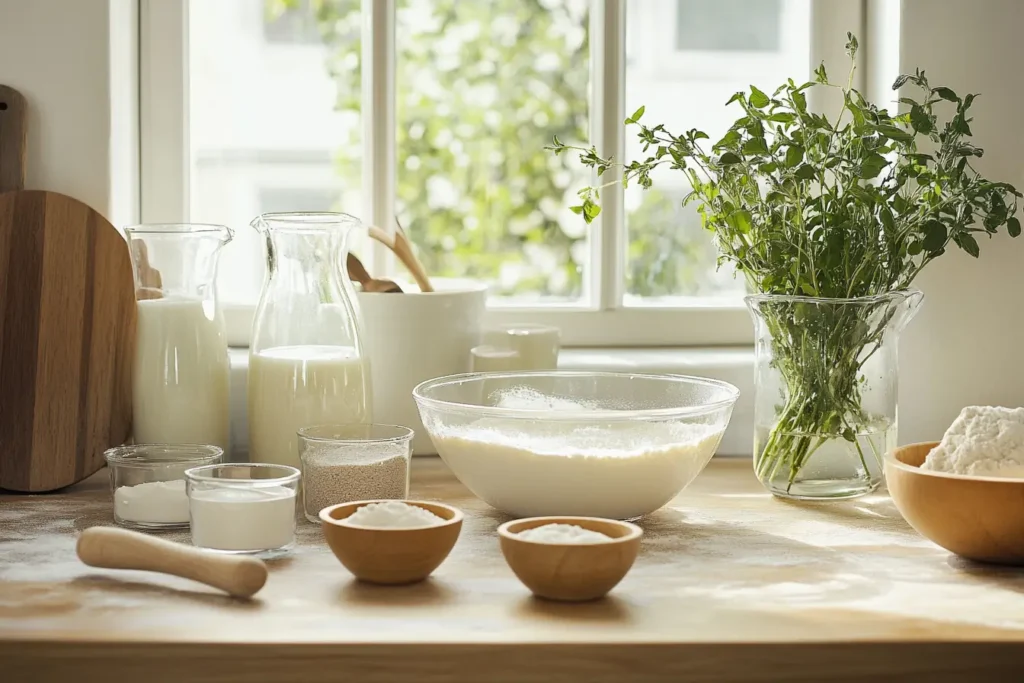
Every gipfeli recipe begins with a list of essential ingredients that contribute to its flaky layers and delicious taste. The foundation is flour, and bread flour is ideal because of its high protein content, which creates a strong structure. Butter is the star ingredient, providing both flavor and the crucial fat needed for lamination. European-style butter, with its higher fat content, works best.
You’ll also need milk, sugar, and salt, which add depth to the flavor and improve the texture of the dough. Active dry yeast is used to make the dough rise, creating a light, airy texture. These basic pantry staples combine to form a pastry that’s perfect for both sweet and savory adaptations.
Looking for more breakfast inspiration? Discover What Is a Secret Ingredient for Cakes? to elevate your baking game. Craving something savory? Try the Cottage Cheese Bread Recipe: Soft, Savory, and Easy to Make for a comforting homemade delight. For a touch of sweetness, don’t miss the Irresistible Apple and Pecan Danish Pastry Tart: A Flaky, Sweet Delight—perfect for a special morning treat!
Choosing the Best Butter for Your Gipfeli Recipe
In a gipfeli recipe, butter is what creates those beautiful, flaky layers. Keeping the butter cold is crucial throughout the lamination process. Warm butter melts into the dough too quickly, ruining the texture. Some bakers prefer to use unsalted butter for more control over the flavor. For the flakiest results, opt for high-fat European butter—it helps create the crisp yet tender crust that makes gipfeli irresistible.
Substitute Ingredients for a Versatile Gipfeli Recipe
Dietary restrictions shouldn’t stop anyone from enjoying a homemade gipfeli recipe. You can swap cow’s milk with plant-based alternatives, like almond or oat milk. For vegans, solid coconut oil or vegan butter can replace traditional butter. Just keep in mind that these substitutes may slightly alter the pastry’s texture and flavor.
Step-by-Step Guide to Crafting a Gipfeli Recipe
Preparing the Dough
The dough is the heart of any gipfeli recipe, so preparing it carefully is key. Start by mixing flour, sugar, salt, and yeast in a large bowl. Gradually pour in warm milk, mixing until the ingredients form a cohesive dough. Knead the dough on a floured surface for about 10 minutes until smooth.
Once the dough is ready, place it in a greased bowl and cover it with a clean cloth. Let it rest in a warm place for an hour, or until it doubles in size. This proofing step allows the yeast to work its magic, giving the dough its soft, airy texture.
Laminating the Dough
Lamination is where the magic happens in a gipfeli recipe. Roll out the proofed dough into a large rectangle. Place cold butter evenly across one-half, then fold the dough over to encase the butter completely. Seal the edges carefully to prevent leaks during rolling.
Next, roll out the folded dough into another rectangle and fold it into thirds, like folding a letter. Repeat this rolling and folding process two more times, refrigerating the dough between each step for at least 30 minutes. This creates the delicate layers that make gipfeli so unique.
Shaping and Baking
After laminating, roll out the dough one final time and cut it into triangles. Starting at the wide end, roll each triangle tightly to form a crescent shape. Place them on a baking sheet lined with parchment paper. Cover them with a damp cloth and let them proof for another 30 minutes.
Before baking, brush the gipfeli with a beaten egg to give them a shiny, golden finish. Bake in a preheated oven at 400°F (200°C) for 15–20 minutes, or until puffed and golden brown. Once cooled, enjoy your homemade gipfeli plain or filled with your favorite jam or cream.
Common Mistakes in a Gipfeli Recipe and How to Avoid Them
Overproofing
One of the most common errors in a gipfeli recipe is overproofing the dough. When left to rise too long, the yeast overactivates, resulting in a dense or deflated pastry. To avoid this, monitor the dough closely during the proofing process. It should double in size but not exceed that. A warm but not hot environment helps the yeast stay active without overdeveloping.
Uneven Lamination
Another common mistake is uneven lamination, which can lead to poorly distributed layers and inconsistent baking. To prevent this, always chill the dough and butter between folds to keep them firm. Use a rolling pin to maintain even thickness and roll the dough gently to avoid tearing.
Temperature Issues
Temperature control is crucial in a gipfeli recipe. Warm butter can seep into the dough, eliminating the distinct layers that make the pastry flaky. Working in a cool environment and chilling the dough frequently will solve this problem. Similarly, baking at too low a temperature can result in undercooked pastries. Always preheat your oven to 400°F (200°C) for the best results.
Variations of the Classic Gipfeli Recipe.
Sweet Fillings
The beauty of a gipfeli recipe lies in its versatility. For a sweet twist, consider adding chocolate, almond cream, or fruit preserves before rolling the dough. These fillings melt beautifully during baking, creating a rich and indulgent treat. A drizzle of icing or a dusting of powdered sugar adds a delightful finishing touch.
Savory Fillings
Savory gipfeli are just as delightful as their sweet counterparts. Fill the dough with ham and cheese for a satisfying breakfast or use spinach and feta for a Mediterranean-inspired variation.
Specialty Toppings
Adding toppings can take your gipfeli recipe to the next level. Sprinkle sesame seeds, poppy seeds, or coarse sugar over the egg wash before baking. These small additions boost the flavor and create a visually appealing finish.
Storage and Reheating Tips for Gipfeli
Short-Term Storage
Storing your freshly baked gipfeli correctly is essential for maintaining their crisp texture and buttery flavor. For short-term storage, place the cooled pastries in an airtight container at room temperature. This keeps them fresh for up to two days. To avoid sogginess, avoid wrapping them in plastic wrap directly. A paper bag or a pastry box can also work well to retain their flakiness.
If you plan to enjoy your gipfeli recipe the next morning, simply reheat them in a preheated oven at 300°F (150°C) for 5–7 minutes. This step revives their golden crust and warms up the soft interior, making them taste freshly baked.
Freezing Gipfeli
For long-term storage, gipfeli can be frozen. Once cooled, place them on a baking sheet lined with parchment paper and freeze until solid. Then transfer them to a resealable freezer bag. They’ll keep well for up to two months.
When you’re ready to eat, reheat frozen gipfeli directly in the oven without thawing. Set the oven to 350°F (175°C) and bake for 10–12 minutes. This method keeps the layers intact, resulting in a flaky and delicious pastry every time.
What to Serve with Gipfeli
Traditional Accompaniments
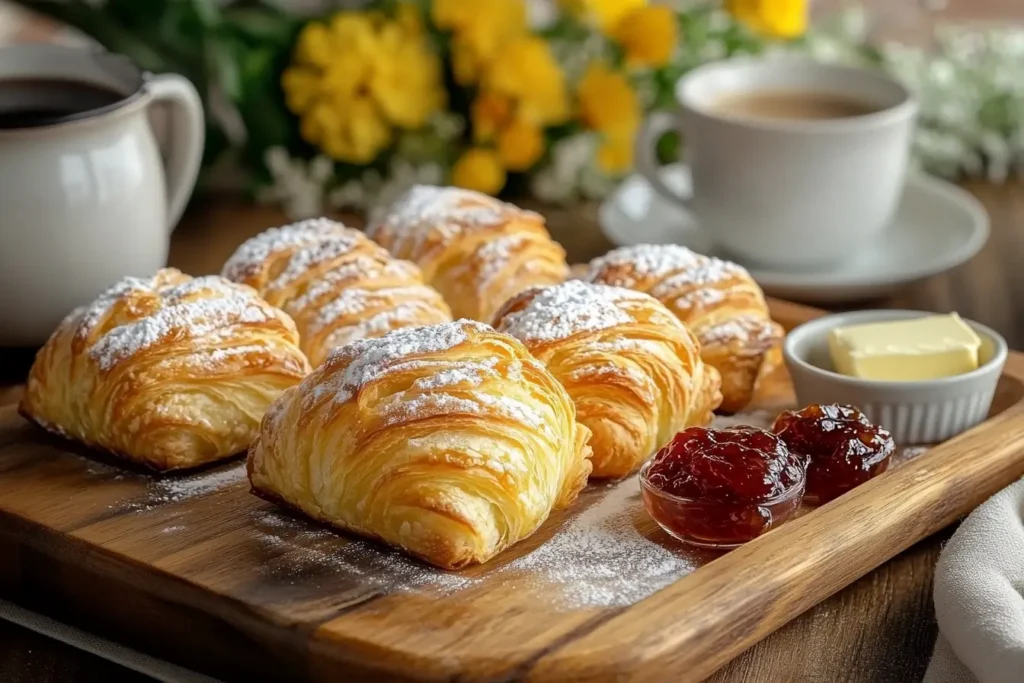
Gipfeli pairs beautifully with a variety of simple accompaniments. For a classic European breakfast, serve them with fruit preserves, honey, or a pat of butter. These add a touch of sweetness that complements the pastry’s flaky layers. Pairing gipfeli with a cup of freshly brewed coffee or tea makes the experience even more enjoyable, creating a delightful start to the day.
Modern Pairings
For a more modern twist, pair your gipfeli recipe with smoothie bowls, fresh fruit salads, or even savory options like scrambled eggs or sliced avocado. These additions create a balanced meal, perfect for brunch or a light lunch.
No matter how you serve them, gipfeli shine as the centerpiece of any table, bringing warmth and satisfaction to every bite.
FAQs About Gipfeli Recipe
How Can I Make My Gipfeli Extra Flaky?
To achieve the flakiest layers in your gipfeli recipe, focus on keeping the butter and dough cold throughout the process. Use a chilled rolling pin and work quickly to prevent the butter from softening. Refrigerating the dough between each fold during lamination helps create those distinct, airy layers. Additionally, avoid overworking the dough, as this can toughen the pastry and reduce its flakiness.
Can I Prepare the Dough Ahead of Time?
Yes, the dough for your gipfeli recipe can be prepared in advance. After the first proofing, wrap the dough tightly in plastic wrap and refrigerate it overnight. This method allows for more flavor to develop while saving time on baking day. If you need to store it longer, freezing the dough is a great option. Just thaw it in the fridge before continuing with the recipe.
Are There Yeast-Free Gipfeli Options?
While traditional gipfeli recipes rely on yeast for their soft texture and rise, yeast-free alternatives do exist. These typically use baking powder or soda as a leavening agent. However, keep in mind that the texture will differ slightly, lacking the airy quality of classic gipfeli.
Summary and Practical Tips
Mastering a gipfeli recipe is a rewarding journey for any home baker. With just a few simple ingredients and some patience, you can create a golden, flaky pastry that’s perfect for any occasion. Whether enjoyed plain, filled with something sweet, or paired with savory accompaniments, gipfeli always impress.
Remember, the key to a successful gipfeli recipe lies in maintaining cold butter, laminating the dough carefully, and allowing enough time for proofing. Avoid common pitfalls like overproofing or uneven lamination, and you’ll soon have a batch of beautiful pastries ready to share.
Finally, don’t hesitate to experiment with variations. Sweet fillings like chocolate or almond cream are crowd-pleasers, while savory options like ham and cheese add a unique twist. Pair them with complementary sides or drinks for a complete and satisfying meal.
Now it’s your turn to try making gipfeli at home. Once you’ve mastered the basics, there’s no limit to how creative you can get with this versatile pastry. Happy baking!


